


Mission - Ranch Hand - Act 2
A D23 Entry for Red Rocks' Shadow - zwoshea.itch.io/rrsash or https://www.drivethrurpg.com/product/422566/Red-Rocks-Shadow

Act 2
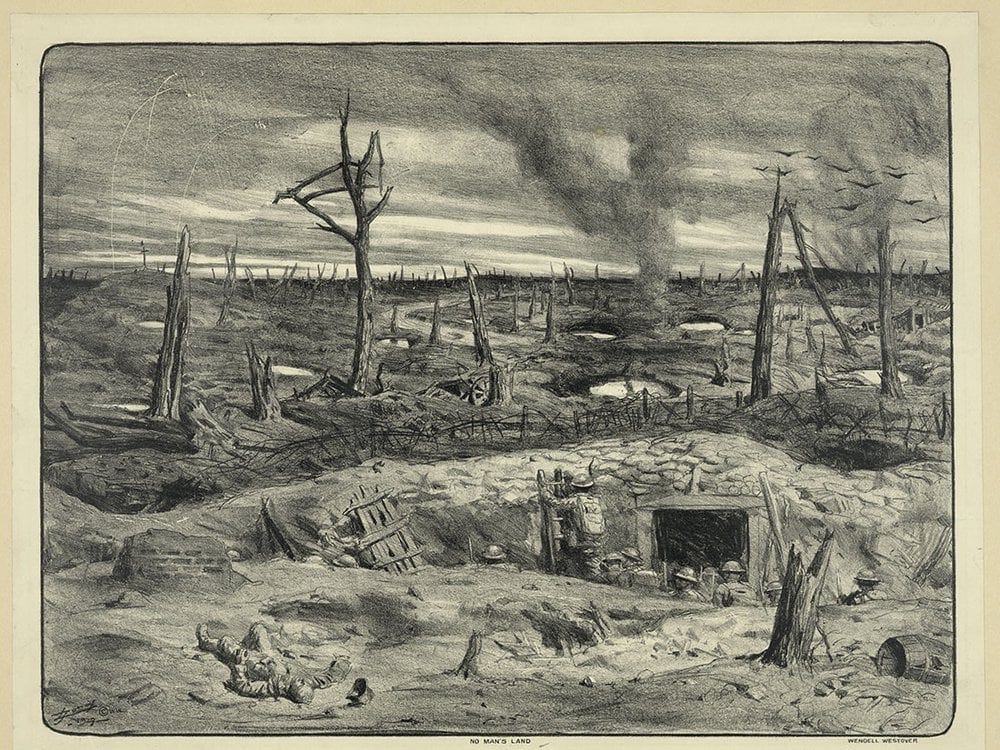
The Cruor Pasture
This wide, ugly field is a blemish on the surrounding landscape. Not that the ravaged land is particularly pretty, but at least it is dead. The Cruor pasture is an open, seeping wound of the world. Like scabs, Cruor Protrusions grow out of the ruddy muck. Their shadows create a gloomy maze buzzing with bloodfleas and stinking of exposed innards. This particular patch is richer than most when it comes to the War’s fuel. The coppery tang of resigned misery coats each breath and the feeling of judgemental eyes upon you grows with each step. Still, a chain-linked fence girds the area. It even seems to be a perfect, terrible square in an imperfect world. Near the middle, large ribs jut from the red-grey mist. They are not the remains of a titanic beast, but rather all that remains of a zeppelin that crashed long ago. Silhouettes walk along the ribs, flickering now and again before disappearing altogether.
The Cruor Pasture is made up of three sections of Near, Close, and Far Range Segments. The first section takes up the space from the BUDS barn through a collection of mostly harvested Cruor Protrusions. The second section is a muddle slog through a misty mire with towering Cruor Protrusions. The last section is comprised of many small Cruor Protrusions, firmer ground, and the zeppelin crash site. The pasture does stretch past that but isn’t important to this act.
Section 1
Broken-down boulders of crystalized Cruor litter this landscape providing some cover for Deserters to use as the need may arise. Piles of spent bullet shells can be found here and there, as well as evidence of grenade detonations. There is a distinct lack of bodies one might expect. The feeling of being watched grows with each footstep across the pasture; this gnawing anxiety feels like a precursor of something terrible to follow. When the tension does break it comes with the chittering of bloodfleas and the creaking of lurching bodies held together by crystalized Cruor and barbed wire. Both the insect clouds and Curdled Shamblers are products of the Cruor Pasture and mindlessly seek more blood and agony to fertilize it. In the Near Segment, it is a good idea to have 1 Bloodflea Cloud for every Deserter. In the Close Segment include 1 Bloodflea Cloud for every Deserter plus 1 Curdled Shambler for each Deserter. Finally, in the Far Segment include 1 Curdled Shambler for each Deserter.
Bloodflea Cloud is reprinted here for convenience.
Bloodflea Cloud (Vermin, Fodder)
A cloud of fingernail-sized fleas with glowing red abdomens. They don’t burrow into their victims, but rather drain them dry and move on to the next unlucky sod.
Health- 2
Attacks -
Swarm Swarm 1 Cruor Harm plus 1 additional Cruor Harm for every 2 Bloodflea Cloud in Near range. Near
Maneuvers - Hide, Infest, Jump
Clotted Shambler (Animate, Fodder)
A collection of human body parts glued together by crystalline cruor cysts, the shamblers are further reinforced by coins of barbed wire.
Health- 3
Attacks -
Slam 2 Physical Harm. If the target has 0 Cruor this deals 3 Physical Harm instead.
Maneuvers - Moan, Shamble, Wander Aimlessly
Section 2
Here the Cruor Protrusions are megalithic in size and contain an eerie interior glow. Occasionally a bubble will ripple through them, despite it being solid crystal. Likewise, people’s shadows reflect off of the facets but when that angle is checked no one is there. Each step is a gross affair, with boots sinking into the mud and coming up with a sickening pop. In fact, this inertia is so difficult to overcome that if a Deserter takes any action and moves or intends to move on their turn, they lose 1 die from that action. As the first Deserter moves into the Close Segment of the section, several of the lurking shadows pull away from the facets and dissolve into the mist. These swaths of mist animate as Hungering Vapor, a human-shaped column of red, clammy fog capable of rending flesh and soul. a Hungering Vapor appears in the Close Segment for each Deserter. At the end of the 5-round sequence, Command takes note of the remaining Hungering Vapors which disperse entirely, this will be important in Section 3. Each Deserter gains 1 additional Cruor point for each Hungering Vapor destroyed.
Hungering Vapor (Animate, Incomprehensible)
The hunger of ancient, alien things made manifest within a fog cloud.
Health- Imaginary -Any time the Hungry Vapor is hit by an attack after its first turn, roll a d6. On a 5 or 6. It is destroyed. This number is lowered by 1 for each turn after that the unknowable has survived.
Attacks -
Warp Mind The Deserter must succeed on a Courage roll or take 1 Blessed damage for each 1 or 2 rolled. Near.
Maneuvers - Menace, Roil Reality, Teleport
There are no Foes in either the Near or Far segments of this session.
Hidden Objective.
If the Deserters found the corpse in a barrel in Act 1, they can follow the Map in this segment to the X. There they will find a foot locker stored on a high ledge of a Cruor Protrusion. Let them figure out how to get it. The Cruor crystal key they found opens the locker. Within is 2 Trophies worth of gold bars that can be exchanged back at Base for 1d6 Vials each.
Section 3
Under the shadow of the zeppelin’s corroded ribs, an altar of sorts has been fashioned from Cruor crystals. It is surrounded by a number of Cruor crystal pillars equal to Pi. The images within the pillars are distorted into impossible fractals within the surface. Trapped within these circles are the missing BUDS workers, aimlessly wandering the mind-bending worlds within. Each has deep shadows where their eyes and mouths should be, their faces distorted as if they are endlessly screaming. Laid out on the altar is a ginger fellow in a ragged Boldric Union’s officer’s uniform. He lays deathly still until the Deserters approach (or attack). At which point he will float up to his feet, arms crossing over his chest. Any Hungring Vapors not destroyed in Section 4 will appears at this point and as he spreads his arms wide, will flow into him. Major Pryne’s eyes and mouth are the same as his victims trapped in the crystal. However, Major Pryne is capable of speech and can be spoken to, but not reasoned with.
Major Pyrne lost his mother on the zeppelin and is trying to go back in time and save her.
The souls of the ‘pests’ under him proved not to be enough to open up the angles needed for him to return.
He is being aided by the angels that spoke to him no matter how many drugs they pumped into him. He faked being unable to get them to be released.
The Deserters burn brightly, and the angels have already supped of their essence. Their entombment should be enough to open the angles.
Likely the Deserters are not going to lay down and let the madman have his way. Thus, Major Pryne’s stats are provided below.
Major Pryne
The agent of Angels or Inconcievables, it is hard to tell, but either way the ginger fellow is a force to be reckoned with.
Health- 15 plus 2 Health for every Hungring Mist not destroyed in Section 2
Armor - 1 Profane and 1 Blessed
Attacks -
Gaze of the Abyss The Deserter must succeed on a Courage roll or take 1 Blessed damage for each 1 or 2 rolled plus 1. Close.
Umbral Tendrils 3 Blessed. 2 Targets. Near.
Maneuvers - Dash, Summon Binding Crystals, Teleport
After being defeated, Major Pryne explodes in a column of blackness while the Cruor monoliths rapidly disintegrate, the entrapped souls flowing into that blackness. The ground rumbles as the zeppelin pulls itself free, fire appearing from nowhere and flowing back into it, and the zeppelin rapidly pulls itself back together. While the reverse explosion washes over the Deserters it causes no damage. Though, they are blinded at the explosion’s brightest point.
As the light fades, the Deserters find themselves standing in the passenger deck of the doomed zeppelin, surrounded by shadow people that recoil from their seats or standing positions as if terrified of the Deserters…
More in Act 3 coming soon.
Not sure what all this means or just want to get started with a Red Rocks’ Shadow campaign yourself? Check out the Red Rocks’ Shadow Ashcan Edition available RIGHT NOW on Itch.io and DriveThru RPG. It’s half-price, $5.00 USD, for the month of January.